Like most successful DIY projects so far this pond build had been preparation, preparation, preparation. But now we get to the real deal installation of the pond liner itself. Here we show step-by-step how we put in our pond liner from the initial unfolding to the pond being ready to accept water
As a pond liner specialist – here at pondkeeper we spend a lot of our time working out the correct size of pond liner for our customers. We always operate to a simple formula, (the mathematics can be automatically carried out for you by using our online pond liner calculator). The basic formula is very simple:
Pond Liner Length = Max Pond length + twice the maximum depth = 1metre (3’3”) for overlap
Pond Liner Width = Max Pond width + twice the maximum depth = 1metre (3’3”) for overlap
Having sold pond liners for many years we have found this formula has always proved itself. You could take a risk and purchase a slightly smaller pond liner, ie you may feel that you don’t need as much overlap. But please bear in mind that any large-sized fabric pieces are often subject to a 5% size tolerance level – the manufacturing process is not always an exact process. Here at pondkeeper we try to get you the right size for your pond – the LAST thing we want to happen is for you to be supplied with a liner that is too small for the hole you have dug. This is the nightmare scenario which leads to a lot of disappointment.
We were aiming to build a pond approximately 4m x 3m x 1m deep (13’ x 10’ x 3’3”) – something that would hold approximately 12000 litres of water (2643 gallons). Using the pond liner calculator maths as described this would mean a pond liner sized 7x6m. However, we eventually plumped for a pond liner sized 8x7m (26’ x 23’). I decided on a slightly bigger pond liner as I was considering a beach area, a waterfall and a bog garden and thought the bigger pond liner would come in useful. Being bigger it means these extra features can be created as part of the main pond project – reducing the need to join pond liners together. Alternatively, sizeable off-cuts are also useful to create subsequent water features.
Once you have your pond liner get it on site and unravel it. Our PondXpert Flexiliner pond liners are supplied as compact bales that need to be unfolded. This is typical – although sometimes you will receive your pond liner on a roll – this is especially true of thicker rubber pond liners that are difficult to fold over on themselves. If the site is in sunlight (and remember your pond should be built in an area that receives sun for at least half of the day), leave your unpacked pond liner in the sun for a while until it softens – this makes it ‘give’ slightly, making it mould into the excavation shape better. (Note: Be careful if the pond liner is lying on turf as it will heat up and may scorch the ground underneath).
It is worth mentioning what side of the liner should be showing once laid. Flexiliner pond liners as used in this example are coated on both sides and can be used either way up. Depending on how it has been seamed you may occasionally get a ‘smarter side” and this is the side that should be showing. This is purely for cosmetic reasons as all of the pond liners we stock are double-sided.
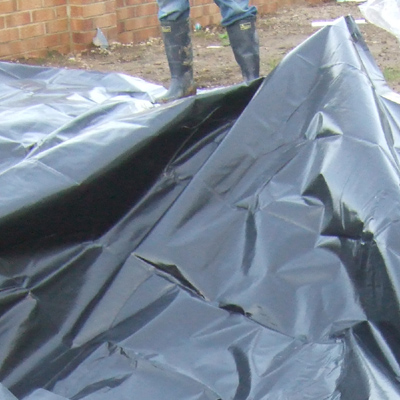
Pull your pond liner into shape inside and around the excavation site. Be careful not to puncture or damage your liner on any rough land or other objects that may exist around the pond site. Get the liner as ‘square’ as possible.
You will need to get into your pond to make sure it is pushed into all of the base and bottom corners. Make sure you take your shoes off before entering the pond as shoes could damage the pond liner. The addition of your weight will immediately pull more pond liner into the pond.
While still in the pond make sure the pond liner is pushed into any steps or planting ledges. You need to try to get the liner as flat as possible against all the pond contours – you are basically mimicking the action of the water that will push and force the lining into shape. The better you can do this the less chance there will be of unsightly creases forming above the waterline once the pond has been filled
Now the pond liner and pond liner underlay are correctly into position you can fill the pond with water.