Following research and planning the first stage of our pond build was to measure and mark out then dig the hole.
Welcome reader. This is the first article in a series that records the events of a garden pond build that we recently undertook from start to finish. We have tried to illustrate our ‘pond build diary’ with a series of photographs – hopefully these images and the accompanying words will interest you and perhaps inspire you to tackle your own pond building project.
In August 2011 we decided to make some improvements to our garden. This gave us the perfect excuse to put in a new garden pond. Our last pond had to be filled in while the children were growing up but as they are now both at junior school it felt safe to develop a new water garden.
Building a pond is like any new project one undertakes – it’s important to do your research but ultimately you have just to get on with it! Also, like with most things, you will probably make mistakes but it is by learning from these mishaps that next time they are easier to avoid. In our case our first pond ended up being too small for our needs – our fish outgrew it quite quickly and we had quite a problem with algae and green water. This time we had more space and time to build our pond so we went for something larger. The blueprint was to make a pond sized 4m x 3m x 1m deep (13’ x 10’ x 3’3”) – something that would hold approximately 12000 litres of water (2643 gallons).
As soon as a spade was put into the earth it became obvious that this was going to be quite a labour-intensive enterprise. With our first pond we had simply used a spade to dig it out. But our first pond was relatively small and the earth was mainly simple topsoil. With this new pond the spade only went into the earth a few inches before stopping. After a few test digs it was obvious that most of the ground was a mix of clay and stone. A difficult combination to dig through.
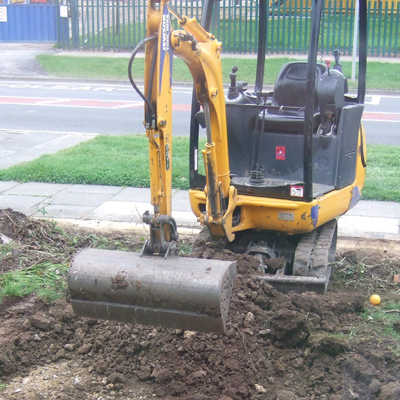
We decided to hire a mini excavator which, at approximately £150 for the weekend, was money well spent. We soon to to grips with the machine and it made light work of digging the hole. After filling approximately 3 full skips we were done. You can see from the photographs that we actually knocked down the front wall which needed replacing anyway – this meant there was easy access for the digger.
This arial shot shows the pond just before the pond liner underlay and pond liners went in. You can see the planting shelf near the perimeter and also the slope that was included in then final pond design at the bottom of the photo
That’s me in the hole! Actually, the photograph is misleading as it’s a lot deeper than it looks. At it’s deepest point we dug to about 4’ deep (1.2m) knowing that this depth should be easier to keep clean and that it would be deep enough for koi and other fish to overwinter during the cold months ahead.
So now we had a hole it was time to get in it and dig out the final shape